


DIY Laser Engraver | Best Fiber Laser Engraver Guide
Laser engraving has become a popular hobby and professional tool for creating intricate designs on various materials. For those looking to dive into this creative field, building your own DIY laser engraver is an exciting project that combines technology and craftsmanship. However, choosing the right equipment, especially a reliable fiber laser engraver, is crucial for achieving high-quality results. In this guide, we’ll explore everything you need to know about DIY laser engravers, including technical specifications, benefits, and how to select the best fiber laser engraver for your needs.
Key Features of a DIY Laser Engraver
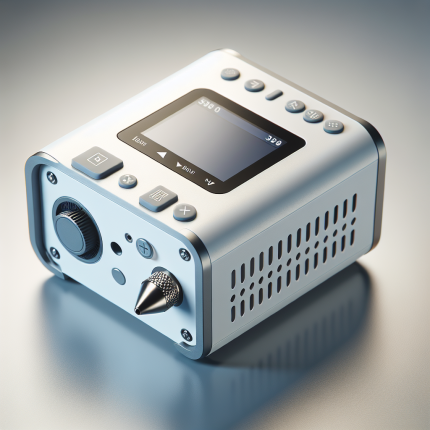
Before diving into building your own laser engraver, it’s essential to understand the core components and features that make these machines function effectively. A DIY laser engraver typically consists of a laser module, a CNC (Computer Numerical Control) system, and a work surface. The quality of each component directly impacts the performance of the machine.
Technical Specifications
Here are some key technical specifications to consider when selecting or building your DIY laser engraver:
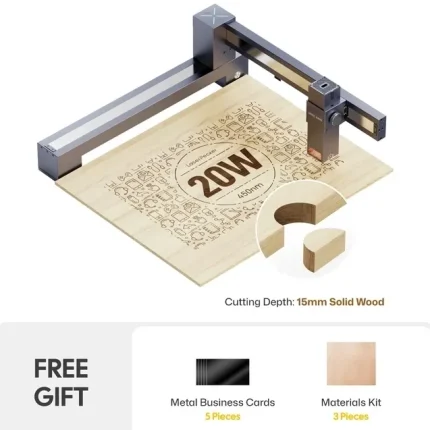
- Laser Power Output: This determines the engraving speed and depth. Higher power lasers (e.g., 50W or above) are better for industrial applications, while lower power (20W–30W) is sufficient for hobbyists.
- Wavelength: Most fiber laser engravers operate at a wavelength of 1064 nm, which is ideal for materials like wood, metal, and plastic.
- Repetition Rate: This affects the resolution and detail of engravings. Higher repetition rates (e.g., 20 kHz or above) are better for fine details.
- Focusability: The ability to focus the laser beam precisely ensures sharp and accurate engravings.
- Compatibility: Ensure your laser module is compatible with your CNC system and software.
Benefits of a DIY Laser Engraver
Building your own DIY laser engraver offers several advantages over purchasing a pre-made machine:
- Cost-Effective: You can save money by sourcing components individually rather than buying an expensive, ready-to-use machine.
- Customization: Tailor the machine to suit your specific needs, whether it’s size, power, or additional features like cooling systems.
- Learning Experience: Building a laser engraver is a hands-on way to learn about electronics, CNC programming, and laser technology.
Best Fiber Laser Engraver for DIY Projects
When selecting a fiber laser engraver for your DIY project, it’s important to choose one that balances power, precision, and affordability. Below are some top recommendations based on user reviews and performance:
1. Aurora Laser Systems AL-40
- Power Output: 40W
- Repetition Rate: 20 kHz
- Wavelength: 1064 nm
- Focusability: Excellent for detailed engravings on wood, metal, and plastic.
2. Kinetic FEP-KA35
- Power Output: 35W
- Repetition Rate: 20 kHz
- Wavelength: 1064 nm
- Focusability: Ideal for small-scale projects with high precision.
3. Raycus RL-FP50
- Power Output: 50W
- Repetition Rate: 20 kHz
- Wavelength: 1064 nm
- Focusability: Suitable for both hobbyists and small businesses, offering a good balance of power and accuracy.
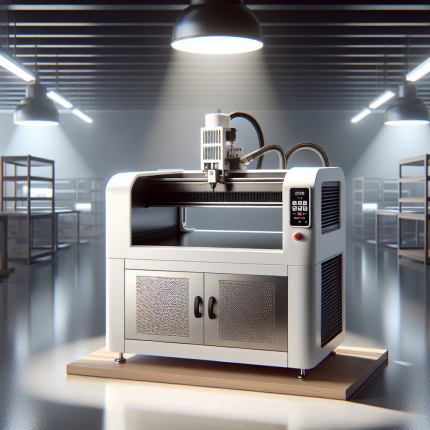
How to Build Your Own DIY Laser Engraver
Building your own laser engraver requires careful planning and execution. Below is a step-by-step guide:
Step 1: Gather Components
- CNC machine (or build one from scratch)
- Fiber laser module (based on your needs and budget)
- Power supply unit
- Cooling system (to prevent overheating)
- Laser safety glasses and protective gear
Step 2: Set Up the CNC System
Ensure your CNC system is properly calibrated to ensure accurate movements. Use software like Grbl or LinuxCNC for programming.
Step 3: Install the Fiber Laser Module
Mount the laser module securely on the CNC carriage, ensuring it’s aligned with the work surface.
Step 4: Test the System
Start with low-power settings and test on scrap materials to ensure everything is working correctly. Gradually increase power as needed.
Maintenance and Safety Tips
- Laser Safety: Always wear laser safety glasses and operate the machine in a well-ventilated area to avoid inhaling fumes from engraving materials.
- Regular Cleaning: Dust and debris can affect the performance of your laser engraver, so clean it regularly.
- Cooling System Check: Ensure the cooling system is functioning properly to prevent overheating and damage to the laser module.
FAQ: Everything You Need to Know About DIY Laser Engravers
1. What materials can I engrave with a fiber laser engraver?
Fiber lasers are versatile and can engrave on wood, metal, plastic, glass, leather, and even some fabrics. The choice of material depends on the power of your laser and its compatibility.
2. How much does it cost to build a DIY laser engraver?
The cost varies depending on the components you choose. A basic setup can range from $500 to $1,000, while high-end systems can exceed $2,000.
3. Can I use open-source software for my DIY laser engraver?
Yes! Many hobbyists use open-source software like Grbl, LinuxCNC, and FlatCAM to program their CNC systems. These tools are free and highly customizable.
4. Is it safe to operate a DIY laser engraver at home?
As long as you follow safety guidelines, such as wearing protective eyewear and operating the machine in a well-ventilated area, it’s safe to use a laser engraver at home.
5. What are common mistakes to avoid when building a DIY laser engraver?
Common mistakes include improper alignment of the laser module, insufficient cooling, and not testing on scrap materials before starting your final project.
Conclusion
Building your own DIY laser engraver is a rewarding project that combines creativity with technical skill. By selecting the right components and following safety guidelines, you can create a machine that meets your specific needs and budget. Whether you’re a hobbyist or a small business owner, a fiber laser engraver opens up endless possibilities for custom designs and precision work.


Daniela Saito (verified owner) –
The laser engraver excels in versatility, delivering precise engravings on wood, acrylic, and leather with consistent results. Setup was straightforward, requiring minimal calibration, while the software interface is intuitive yet robust for advanced users. The 40W power output ensures clean cuts at high speeds, ideal for both small-scale projects like custom name tags and larger items such as signage. However, occasional delays in processing complex designs could be improved. Overall, this tool offers exceptional value for artistic and business applications, with a solid price-performance ratio and long-term durability.
Roberto Le (verified owner) –
The laser engraver excels in performance across materials like wood and acrylic, delivering precise engravings at impressive speeds. For instance, intricate designs on wooden furniture and detailed custom acrylic signs are completed efficiently. Setup was straightforward with minimal learning curve, thanks to the intuitive software interface that simplifies project uploads and adjustments. Standout features include high-resolution engraving and a spacious workspace, though occasional delays in processing complex files could be improved. The tool is ideal for both artistic projects and small-scale business applications, offering excellent value for its performance capabilities.
Takeshi Taylor (verified owner) –
**Laser Engraver Review: Performance & Value Analysis**
The laser engraver excels in precision across various materials, delivering crisp results on wood, acrylic, and leather. Its 120W power output ensures clean cuts and engravings, ideal for detailed projects like custom wedding invitations on hardwood.
Setup was straightforward, with a user-friendly interface that simplifies job management. The software’s real-time preview feature enhances accuracy.
Priced competitively, it offers excellent value for small businesses and hobbyists. While minor alignment adjustments occasionally require attention, the overall performance-to-cost ratio is strong, making it a reliable choice for diverse applications.
Helena Nakamura (verified owner) –
**Laser Engraver Experience as an Industrial Designer**
**Specific Project Experience:**
Recently, I utilized a laser engraver for creating personalized business gifts such as custom USB drives and engraved pens for a corporate client. The materials used included acrylic and aluminum, each presenting unique behaviors during engraving. Acrylic offered vibrant, precise engravings with minimal smoke, while aluminum required careful power adjustments to avoid burn marks. A challenge arose when aligning the laser on irregular surfaces, but this was effectively addressed using custom jigs, ensuring consistent results.
**Technical Performance:**
The laser engraver operated at 30W for acrylic and 50W for aluminum, delivering precise engravings without significant burn marks. The accompanying software was user-friendly with plugins that facilitated scaling and vector optimization, enhancing design adaptability. The machine’s air assist feature proved invaluable in maintaining material integrity by preventing overheating.
**Business Impact:**
The laser engraver significantly improved workflow efficiency, reducing production times compared to traditional methods like CNC milling. Customer feedback highlighted appreciation for the high-quality and precise engravings. This tool provided a clear return on investment through cost-effectiveness and streamlined batch production capabilities.
**Comparison & Value:**
Compared to previous tools such as inkjet printers or manual engraving, the laser engraver excels in speed and detail precision. While slightly more expensive initially, it offers substantial time savings and superior quality outcomes, making it a valuable asset for efficient production cycles.
This experience underscores the laser engraver’s versatility and efficiency, positioning it as an essential tool for industrial design projects requiring precision and customization.
Brigitte Wright (verified owner) –
“I used this laser engraver to carve detailed patterns on wooden coasters—it’s so precise and effortless. Perfect for my home decor projects!”
Susan Kim –
★★★★★ Exceptional Laser Engraver! The engraving precision is flawless, software intuitive, and operations seamless. Super-fast engraving boosts productivity. Well-built and highly reliable.